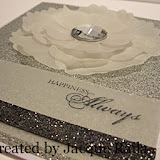
Jacob’s Ladder
Mini Album Tutorial
Supplies:
12 Coasters – 4” x 4”
3 pieces of lightweight ribbon - 45” each
12 Designer Series Paper – 4” x 4”
Sticky Strip
Mono Multi, or other Adhesive
1. Cover one side of each Coaster with DSP, using adhesive of choice – I use Tombow Mono Multi. Round corners, trim edges, sand as necessary.
2. Set 6 coasters aside. Mark the remaining 6 coaster on the back side with lines drawn at ¾”, 2” and 3 ¼”
3. Lay down Sticky Strip on the top, bottom and across each line on the back of these 6 coasters, trim to edge.
 4. Adhere the ribbons to the Sticky Strip lines, beginning as shown in the picture with alternating Ribbon pieces, two to the left, one to the right, as shown. Adhere an un-lined Coaster to this Coaster, back to back, sandwiching the Ribbon ends between the two Coasters.
5. Bring the Ribbons over this completed page. Now two are to the right and one is to the left. Be sure the ribbon is laying flat against the covered coaster.
6. Lay the DSP side of another lined Coaster on top of the ribbon, creating a stack. Pull the Ribbon snug and bring them across the Sticky Strip lined Coaster and adhere to marked lines.
7. Adhere an un-lined Coaster to this Coaster, back to back, sandwiching the Ribbons between the two Coasters.

8. Repeat this process through all your Coasters, being sure that your Ribbons are nice and flat and snug and alternated each time you put down a Coaster. Before adhering the final Coaster, trim the Ribbon ends so they are hidden between the last two Coasters.
 9. Test your Jacob’s Ladder by lifting the top coaster on the edges with your fingers, left and right side. Now fold the top page back on itself and watch the remaining pages FLIP-FLIP-FLIP over each other. Fold forward to repeat the flipping. If a page gets stuck and doesn’t flip, just flick it with your finger.
10. Decorate the front cover as desired.11. Remember when adding pictures to trim them off center and adhere below the ribbons, so that the flipping mechanism has free movement. Try your pictures before adhering to be sure the Ribbons are not covering important elements. See in the pictures below, how one side will have two ribbons across her face and when flipped, it will have one ribbon down the center. Play with the trimming of your photos a little before permanently adhering to the pages.


Mini Album Box Holder
8 ¼” x 8 ¼” cardstock
4 pieces DSP ¾” x 4”
Scored at 1” and 2” on each of the four sides. Cut along the scored lines and trim tabs to create box. Before adhering four sides of box, circle punch a finger tab on two opposite
 sides.

My Stampin' Events
Current Stampin' Up! Promotions
Mary Rindal is an Independent Stampin' Up! Demonstrator in Greenwood Village, Colorado.


1 comment:
Thank you for the tutorial! Your works is just beautiful. I just love this and so will my daughters.
Post a Comment