Thursday, September 30, 2010

Utah Divas International - Tree Trimmings

This week I played with a color challenge over at Utah Divas International - what a lovely photo they have for color inspiration this week and I enjoyed working with these colors - Concord Crush, Chocolate Chip, Very Vanilla. I used my Stampin' Up! Tree Trimmings Set and my Vintage Trinkets with a touch of sparkle.

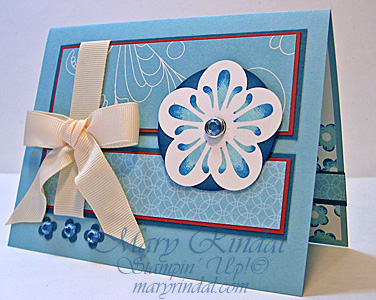
The card base here is Concord Crush, which very well may be my favorite of the In Colors this year. I ran the Chocolate Chip main piece through my Big Shot with the Finial Press Embossing Folder and then rubbed Very Vanilla Craft Ink over the raised areas and around the edge with a Sponge Dauber. This really makes the embossed image pop and is so easy to do - the Sponge Dauber is my friend! I stamped a few of the ornaments from Tree Trimmings stamp set in Chocolate Chip and Concord Crush onto Very Vanilla and embossed them with Iridescent Ice Embossing Powder. Iridescent Ice gives everything such a lovely sparkle and I use it often. I trimmed out the ornaments with my Paper Snips and adhered them to the embossed panel with Mini Glue Dots and some cording. I added the 'merry' tag (also embossed in Iridescent Ice and the edges sponged) attached with one of the pins from Vintage Trinkets to the Very Vanilla Satin Ribbon bow.

{Inside}
Recipe:
Stamps: Tree Trimmings, Tiny Tags
Cardstock: Concord Crush, Chocolate Chip, Very Vanilla
Ink: Concord Crush, Chocolate Chip, VersaMark, Very Vanilla
Accessories: Finial Press Textured Embossing Folder, Iridescent Ice Embossing Powder, Vintage Trinkets, Very Vanilla Satin Ribbon, Medium Jewelry Tag Punch, Copper Cord (retired)


My Stampin' Events
Current Stampin' Up! Promotions


Mary Rindal is an Independent Stampin' Up! Demonstrator in Greenwood Village, Colorado.

Wednesday, September 29, 2010

October Stamp A Stack


Christmas Card Stamp A Stack
Friday October 15th 9:30 am or 5:30 pm

Get a head start on your Christmas cards with this great event - we'll stamp a STACK of cards in a variety of styles. You'll love your handcrafted cards and will especially love that you can check an item off your holiday 'to-do' list! 16 cards for $20

Stamp 4 cards each of every design that you choose and make as many cards as you'd like. Please RSVP via e-mail with each design of your choice, the number of cards you want to stamp and morning or evening session. 


Snowflakes Card 


Christmas Cardinals


Black & White noel

Ornaments Card

Christmas Skaters
 

HoHoHo! Card (3x6)
 

Santa Face   
{design by Heather Hampton Freeman}
 

Glittering Reindeer
 

Sparkling Peace
Halloween Web


My Stampin' Events
Current Stampin' Up! Promotions


Mary Rindal is an Independent Stampin' Up! Demonstrator in Greenwood Village, Colorado.

Tuesday, September 28, 2010

Mojo Monday - With All My Heart

Here is my card for the Mojo Monday 158 sketch this week. I need several cards without words or sentiments and have struggled with their design. Although this sketch does have a sentiment included, I found it suited a word-free card, too. I used the Stampin' Up! With All My Heart stamp set and the coordinating Flower Punch with Elegant Soiree Designer Series Paper.

I inked the largest flower from With All My Heart in Baja Breeze Classic Ink and then used a Sponge Dauber to add Not Quite Navy Classic Ink to the edges of the flower petals.  I stamped this onto a piece of Very Vanilla Textured cardstock and punched it out with the Fancy Flower Punch. This is matted onto a circle from the Circles #2 die for the Big Shot in Not Quite Navy and a blue Rhinestone Brad in the center. I also unwrapped three blue Rhinestone Brads from their mounts and adhered them to Not Quite Navy punched flowers from one of the Itty Bitty Punches.

{Inside}
Recipe:
Stamps: With All My Heart
Cardstock: Baja Breeze, Not Quite Navy, Cajun Craze, Very Vanilla, Elegant Soiree DSP
Ink: Baja Breeze, Not Quite Navy
Accessories: Fancy Flower Punch, Very Vanilla 5/8" Grosgrain Ribbon, Ice Round Rhinestone Brads, Itty Bitty Punches, Circles #2 Die


My Stampin' Events
Current Stampin' Up! Promotions


Mary Rindal is an Independent Stampin' Up! Demonstrator in Greenwood Village, Colorado.

Monday, September 27, 2010

Autumn is here - Lovely as a Tree

Yes, Autumn is here, in spite of a few days of record setting heat, we have had some cool nights and beautiful days. I do love fall in Colorado and I love the warm fall colors to create with, too. This card uses that classic Stampin' Up! set Lovely As A Tree. I think Lovely As A Tree must be one of, if not THE, oldest stamp set in the current Idea Book & Catalog and I love it! I am not ready for it to retire anytime soon!

I stamped the oak leaves and acorn image in Cajun Craze ink onto a piece of Bashful Blue cardstock. The scalloped edge is several 1 1/4" Circle Punches from More Mustard cardstock adhered under the edge of the main panel. I sponged all the pieces of cardstock with More Mustard ink and Cajun Craze ink. I love how sponging just finishes a card and is so pleasing to the eye. I did a little Rock N Roll technique with the small leaf image in More Mustard ink and then into the Cajun Craze. A knot in some Early Espresso Grosgrain ribbon and a photo corner embellishment finished this card for me.

{Inside}
Recipe:
Stamps: Lovely As A Tree
Cardstock: Early Espresso, More Mustard, Cajun Craze, Bashful Blue, Very Vanilla
Ink: Cajun Craze, More Mustard
Accessories: Photo Corner Punch, 3/4 and 1 1/4 Circle Punches, Early Espresso 5/8" Grosgrain Ribbon, Metal Brads


My Stampin' Events
Current Stampin' Up! Promotions


Mary Rindal is an Independent Stampin' Up! Demonstrator in Greenwood Village, Colorado.

Friday, September 24, 2010

Pacific Point - Elements of Style

Yay -this card is one that made me happy! Don't you just love those Stampin' moments where you stand back and smile and want to clap your hands?! And did you notice that I used THREE of the Antique Brads on this card - {faint!)

The color combination here, Pacific Point, Melon Mambo, Pumpkin Pie, came from my Color Coach - I really do like that new little accessory from Stampin' Up! I used the stamp set Elements of Style.

I inked up the hummingbird stamp in Pumpkin Pie Classic Ink and then used a Sponge Dauber to add Melon Mambo and Pacific Point. Then I cut him out and popped him up on Stampin' Dimensionals over the roses image. The roses are stamped in StazOn Jet Black ink and then I used the Blender Pen to add just a little bit of color. And of course I had to finish them with some Two Way Glue Pen and Dazzling Diamonds Ultra Fine Glitter!

{Inside}
Recipe:
Stamps: Elements of Style
Cardstock: Pacific Point, Melon Mambo, Pumpkin Pie, Whisper White
Ink:StazOn Jet Black, Pacific Point ,Certainly Celery
Accessories: Finial Press Embossing Folder, Antique Brads, Scallop Trim Border Punch, 1 1/4 and 1 3/8 Circle Punches, Ticket Corner Punch, Dazzling Diamonds


My Stampin' Events
Current Stampin' Up! Promotions


Mary Rindal is an Independent Stampin' Up! Demonstrator in Greenwood Village, Colorado.

Wednesday, September 22, 2010

SA Color Challenge - Awash with Flowers

This card is for the SA Color Challenge from last week - a tough one for me - Early Espresso, More Mustard, Cajun Craze, Certainly Celery, Bashful Blue, Very Vanilla. I stamped it with my Stampin' Up! Awash With Flowers stamp set and the Satin Ribbon that is so lovely to play with.

The Certainly Celery panel was embossed with the Polka Dots Textured Embossing Folder and then matted onto a piece of Early Espresso. I stamped the flowers and butterflies with a few generations of ink from More Mustard, Bashful Blue, Cajun Craze and Certainly Celery. I added a circle embellishment with another butterfly to the Certainly Celery Satin Ribbon bow. A few touches of Two Way Glue Pen and some Dazzling Diamonds finished off this card with a little sparkle.

{Inside}
Recipe:
Stamps: Awash with Flowers
Cardstock: More Mustard, Early Espresso, Certainly Celery, Cajun Craze, Very Vanilla
Ink: More Mustard, Early Espresso, Certainly Celery, Cajun Craze, Bashful Blue
Accessories: Certainly Celery Satin Ribbon, Polka Dots Embossing Folder, 1 1/4 and 1 3/8 Circle Punches, Dazzling Diamonds Ultra Fine Glitter


My Stampin' Events
Current Stampin' Up! Promotions


Mary Rindal is an Independent Stampin' Up! Demonstrator in Greenwood Village, Colorado.

Tuesday, September 21, 2010

Mojo Monday - Wellness Wishes

I like starting my stamping week with the Mojo Monday sketches and here's my card for Mojo157. I used the Stampin' Up! set Wellness Wishes for this card along with the ever versatile Baroque Motifs. I made tiny shabby flower embellishments, too, using one of the Itty Bitty Punches. I also used Elegant Eggplant Craft Ink and Clear Embossing Powder to make the sentiment shiny and lovely and of course, popped it up onto Stampin' Dimensionals.
Here's a closer look at the flowers. I just couldn't find an embellishment to go with this that was making me happy and when I layered these together I knew it was just the right ones! I punched 6 tiny flowers from the Itty Bitty Punches and layered 2 together. Then I used the Paper Piercer to poke a hole in the center and added a Neutral Brad. I also used the Paper Piercer to curl up the edges of the top layer of the flower and the Mat Pack to pierce a straight line of holes to adhere my tiny flowers.

{Inside}
Recipe:
Stamps: Wellness wishes, Baroque Motif
Cardstock: Elegant Eggplant, Perfect Plum, Blushing Bride, Very Vanilla
Ink: Elegant Eggplant Craft Ink, VersaMark
Accessories: Scallop Trim Border Punch, 1" Circle Punch, Very Vanilla Satin Ribbon, Itty Bitty Punches, Neutral Brads, Mat Pack, Paper Piercer, Ticket Corner Punch

Monday, September 20, 2010

Happy Fall!

It's the first day of Autumn and in Colorado we set a record heat temperature yesterday (96 degrees) and may set another record today! What happened to those cool fall days we were enjoying last week!?! This card is a make-over of the Autumn Leaves card I made last week for the Colour Q Challenge. I used some of my cast-off leaves from the Stampin' U! Leaves #2 die for the Big Shot and also the Square Lattice Textured Impressions Embossing Folder. And of course I used a knot of the Cherry Cobbler Seam Binding from the Holiday Mini Catalog - love this color and this seam binding ribbon! The technique here is called Imbedded Embossing.

{Inside}
Recipe:
Stamps: Three Little Words, Autumn Harvest
Cardstock: Wild Wasabi, Pear Pizzazz, Peach Parfait, Cherry Cobbler, Early Espresso
Ink: Early Espresso, Peach Parfait, Cherry Cobbler
Accessories: Leaves #2 Die, Square Lattice Embossing Folder, Jumbo Eyelets, Cherry Cobbler Seam Binding

Thursday, September 16, 2010

Sketch Challenge - Just Believe

Today I stamped with the Stampin' Addicts Sketch Challenge and my favorite Stampin' Up! set Just Believe. I used a technique called Misting with Markers, where I colored the rubber with various colors Markers and then misted it with a fine mist water bottle before stamping it onto my Very Vanilla cardstock. You can vary the water colored look of the stamped image by the amount of water that you mist onto the rubber. It's a great way to add variation and colors to a solid stamp image. It also works with the WaterColor Wonder Crayons.


After I put my card together, I went back and added some touches of Dazzling Diamonds Glitter to several of the flowers and leaves images with my Two Way Glue Pen as the adhesive. My Technique Club did several Glitter Techniques this month and since then I can't stamp a card without adding glitter to it! I warned my ladies that they would be going home with lots of sparkle EVERYWHERE but I don't think they realized how true that would be! After they finished their cards and projects every one of them was dazzling and glittery. I'm sure my room will be sparkly forever.

What do you think - to Glitter or Not to Glitter? What is your favorite embellishment that you like to add to every card you stamp?!

{Inside}
Recipe:
Stamps: Just Believe
Ink: Cherry Cobbler, Peach Parfait, Wild Wasabi markers
Cardstock: Cherry Cobbler, Peach Parfait, Wild Wasabi, Early Espresso, Very Vanilla
Accessories: Metal Brads, Dazzling Diamonds Glitter, Seam Binding in Cherry Cobbler

Tuesday, September 14, 2010

Colour Q Challenge - Big Shot Leaves Die

Today I tried a color combination challenge from Colour Q, CQC#50 is Cherry Cobbler, Early Espresso, Pear Pizzazz, Peach Parfait. I've been loving our autumn weather recently so I used my Stampin' Up! Leaves Die for my Big Shot and created a fall card with these beautiful colors!

The Leaves #2 Die is a Bigz Die, so it will cut several pieces of cardstock at once - I put all 4 colors of cardstock on the die and ran it through just once to cut out a great assortment of leaves. As I played with my layout, I ended up not using any of the Pear Pizzazz leaves and kept to the oak leaf and maple leaf of the four different leaf designs - so pretty! I set aside the extras for another project. I used my Cutter Kit tool to distress the edges of my card mat. Then I stamped my sentiment and the '4 You' piece, which I punched out with a 1/2" Circle Punch and placed on a Build A Brad with it's epoxy finish. Those Build A Brads are so fun and a great way to customize a beautiful embellishment - why don't I use them more often?!

{Inside}
Recipe:
Stamps: Thank you Kindly, Tiny Tags, Autumn Harvest
Cardstock: Cherry Cobbler, Early Espresso, Pear Pizzazz, Peach Parfait, Whisper White
Ink: Early Espresso, Cherry Cobbler, Pear Pizzazz
Accessories: Leaves #2 Die, Build A Brad, Cutter Kit


Monday, September 13, 2010

Stampin' Up! Catalog Case - Beautiful Wings

This card is a pretty direct CASE from a sample in the Stampin' Up! 2010-2011 Idea Book & Catalog. The only changes I made were to skip the background stamping, add the Rainbow Glitter Strip and I also changed the card size to a 3x6, which fits into our Small Open Ended Envelopes. I just love these butterflies from the Beautiful Wings Embosslit and then add some Glitter and well, what else could you ask for?!

I added Dazzling Diamonds glitter to all the raised embossed areas of each of the butterflies. For the Rainbow Glitter strip I first scored a 1/4" strip across the lower edge of the card using a ruler, the Grid Paper with it's 1/4" grid lines and my Bone Folder. The scored lines help me put down the Sticky Strip in a straight line. I also wiped the cardstock with my Embossing Buddy to reduce the static and help all the glitter stick only where I want it to stick. I pulled back only a portion of the backing from the Sticky Strip and covered the exposed adhesive with one of the colored glitters from the  Fine Cosmo Glitter Stack. I tapped off the excess Glitter. Then I pulled the backing strip back a little further and added another color of Glitter. I repeated these steps until the entire strip was covered with Glitter. A few finger rubs help to set the glitter as well.

{Inside}
Recipe
Stamps: Smarty Pants
Cardstock: Pumpkin Pie, Melon Mambo, Marina Mist, Wild Wasabi, Whisper White
Ink: Early Espresso
Accessories: Beautiful Wings Embosslit, Dazzling Diamonds,  Fine Cosmo Glitter

Wednesday, September 8, 2010

Mojo Monday Sketch - Winter Post

Here's the card I stamped this week for the Mojo Monday Sketch 155 with my Winter Post set from Stampin' Up! I love this set that I've had for a few years and especially with these colors - Cherry Cobbler, Old Olive, Very Vanilla and Early Espresso. I also used some of the lovely Cherry Cobbler Seam Binding from the Stampin' Up! Holiday Mini Catalog.

The large Scallop and Circle are cut from the Big Shot. I used a piece of Sticky Strip to ruffle the Seam Binding and tucked the tag under. The sentiment on the tag is from a retired Stampin' Up! set, but I loved the type on it and the size was just perfect for this sketch. I brushed all the paper edges with some Cherry Cobbler ink and finished the inside with a strip of Cherry Cobbler and another piece of the Jolly Holiday DSP.


{Inside}
Recipe:
Stamps: Winter Post, Best Yet
Cardstock: Cherry Cobbler, Old Olive, Jolly Holiday DSP, Very Vanilla
Ink: Early Espresso
Accessories: Cherry Cobbler Seam Binding, Paper Piercer, Big Shot Scallop Circle, Big Shot Circles #2, Scallop Border Punch

Monday, September 6, 2010

Color Challenge - Serene Snowflakes

Here's a quick and easy card I made last week for the Stampin' Addicts Color Challenge 65. I used my new Northern Flury Embossing Folder from the Stampin' Up! Holiday Mini Catalog, too. That bit of snowflake embossing on the base of the card really finished this card and I just love how easy it is to use my Big Shot for this kind of texture!

Be sure to check out the daily Stampin' Addicts Challenges - it's a great way to kick start a stampin' project. My favorite challenges are the Color Challenges and the Sketch Challenges. Stampin' Addicts is free to join and you can just browse the gallery for lots of inspiration or get involved in a discussion on the forums.
{Inside}
Recipe:
Stamps: Serene Snowflakes, Kind Thanks
Cardstock: Baja Breeze, Early Espresso, Very Vanilla
Ink: Baja Breeze, Early Espresso
Accessories: Jumbo Eyelets, Northern Flury Embossing Folder

Friday, September 3, 2010

Envelopes with Class - Showcase your Card Art


I like to finish the inside of my cards as well as the envelope. Remember the Fifth Ave Floral card from last week? I used a color combination from the Elegant Soiree Designer Series Paper. Then I lined my envelope with a piece of that DSP. See how pretty and finished that looks? I just score a piece of DSP about an inch and then lay my envelope flap over the back of it. Trace lightly with a pencil and then trim with my Paper Snips. Slide the cut and scored DSP into the top of the envelope with a tiny bit of Tombow Mono Multi Adhesive and it's finished.
Here's another way to finish an envelope. This envelope flap is embossed with the Vintage Wallpaper Textured Embossing Folder in the Big Shot. It coordinates with the embossed background of a card I stamped last week, but apparently haven't posted to my blog yet. Embossing the envelope flap is SO easy and I think is a wow look.

To emboss the flap only of the envelope, open the envelope and place the flap inside the Textured Embossing Folder.  Then place this between the two Cutting Mats onto the Multi Purpose Platform, just as you would to emboss a card. However, line up the top edge of the top cutting mat with the fold line on the envelope flap. This ensures that the embossing will be clean and straight and it won't add creases and stretch marks to the rest of the envelope with the pressure of the Big Shot.

Here's another envelope that is stamped and embossed. I made it for this Rich Razzleberry Snowflake card. Can you see the Northern Flury embossing on the envelope flap? The front corner of the envelope is stamped with the snowflakes from Serene Snowflakes stamp set. Both of these were used on the card that will be tucked into this envelope.


You created a beautiful hand stamped card and when you send it, be sure that you enclose it in a beautiful envelope! I always use the Envelopes from Stampin' Up! because they have such a better finish - the flaps are rounded not squared, and the paper has a high quality look and feel. Compare them to other envelopes and you'll see what I mean!   Send your card off with the touch of class that it deserves!


Related Posts with Thumbnails