Tuesday, November 30, 2010

Vintage Christmas - Dasher

Lovely and sparkly and faded and shabby - that's the vintage look I was going for with this card.  Vintage is a style that I love, but I think it's one of the more difficult styles for me to create. But for the card I used some Stampin' Up! products and colors that really lent themselves to Vintage and that helped me! The Dasher stamp Heat Embossed in Rich Razzleberry with the Cutter Kit to distress the edges of the Soft Suede mat, the beautiful and soft Victoria Lace and these Mini Vintage Tags.


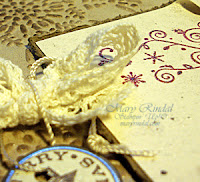
Here's a closer look at the splatter and sparkled from a heavy spray of Shimmer Paint Spray. I ran the Crumb Cake piece through the Big Shot with the Northern Flurries Texture Folder and then used a Sponge Dauber to add some Soft Suede ink onto the raised snowflakes. I sprayed both this piece and the matted Dasher piece with the Shimmer Paint Spray and then added the other elements.


The Mini Vintage Tags are a bit shimmery themselves, and I stamped this one with the sentiment from Delightful Decorations in Soft Suede ink. Then I tied it onto the bow from the Victoria Lace, which I am just in love with! I popped both the Dasher piece and the tag up on Stampin' Dimensionals for the height and so that lovely tag stayed just where I wanted it to be.


{Inside}
Recipe:
Stamps: Dasher, Delightful Decorations, Four the Holidays
Ink: VersaMark, Rich Razzleberry, Soft Suede, Champagne Shimmer Paint
Cardstock: Soft Suede, Crumb Cake, Naturals Ivory
Accessories: Northern Flurries Texture Embossing Folder, Clear Embossing Powder, Cutter Kit, Victoria Lace, Mini Vintage Tags


My Stampin' Events
Current Stampin' Up! Promotions


Mary Rindal is an Independent Stampin' Up! Demonstrator in Greenwood Village, Colorado.

Monday, November 29, 2010

Adhesives - such a Personal Decision

A few weeks ago I shared some of my favorite tools - those Stampin' Up! products that are always on my table helping create my projects. Today I want to talk about another behind-the-scenes tool - Adhesive. What do you prefer to use when assembling cards, 3D projects or scrapbook pages? When I started stamping years ago I tried several different kinds and brands of adhesive that my friends were using or that different stamp instructors were using. I ended up primarily using Scotch Double Sided Tape as my Adhesive of Choice.

When Stampin' Up! started carrying the Tombo Mono Multi-Purpose Liquid Glue (the little green bottle) I gave it a try and fell in love! Tombow Mono Multi is my go-to adhesive for most of my cards and projects. It has a bit of a learning curve as far as how much or how little to use - often much less than you think! It's a strong little glue and will hold your layers together well and for a long time. I like that it has a 'slide factor' when I first put my pieces together. That gives me just a few seconds to be sure my layers are aligned evenly the way I want them. Then a quick rub and they are stuck together permanently! Mono Multi is a temporary OR permament adhesive - to use it as a temporary adhesive allow it to dry before adhering. To use it as a permanent adhesive, adhere while still wet. And to remove any messy glue residue, if you have some liquid that squeezes out between your layers, lift the excess with a Paper Piercer or scrap of cardstock, allow the remainder to dry and then remove it with the Adhesive Remover. I used to use a lot of Sticky Strip when I was working with 3D projects and boxes, however I've found that Tombow Mono Multi holds these together very well and I'll use Tombow first on those items.

As much I love the Tombow Mono Multi, it just doesn't work well with fabric or ribbon. Mini Glue Dots are another adhesive that is perfect to stick down that ribbon knot, keep that bow in place or tuck a piece under the cardstock mat. I use my Paper Piercer to pick up a Mini Glue Dot and stick it just where I need it to do its work.

And I can RARELY create a stamped card or scrapbook page without some Stampin' Dimensionals! These beauties  are double-sided adhesive foam mounts that add height and create beautiful layers and dimension on your projects. I like their thickness, but occasionally I will stack two on top of each other to give something a little EXTRA lift. The hexagon shapes are just the right size for most projects and I even like to use the straight edges of the border strips, too.

As much as I love these Adhesives, especially my Tombow Mono Multi, I know that adhesives are a personal choice and you've got to try several to find just the right one for you and your projects!


My Stampin' Events
Current Stampin' Up! Promotions


Mary Rindal is an Independent Stampin' Up! Demonstrator in Greenwood Village, Colorado.
Friday, November 26, 2010

Christmas 2010 - Star Book with Jolly Holiday DSP

I hope you enjoyed lots of food and relaxation with family yesterday! I am doing just that today, too! But I wanted to share this project with you -I planned something ahead! :) This is the cover of a Star Book I made for our Christmas pictures this year. I used a half package of the Jolly Holiday Designer Series Paper from Stampin' Up! I also used my Big Shot to cut the year numbers and the little embellishments are from the Merry Embosslit - this Embosslit is part of the Online Spectacular sale going on right now, too! The Merry Christmas sentiment is sparkling with Dazzling Diamonds that I added with Heat N Stick Powder. I added more Dazzling Diamonds to a few of the trees and the tips of the snowflake using my Two Way Glue Pen.

This mini album will accomodate 10-12 pictures or journaling blocks and is a great mini album to have on an end table - I have a collection of a few mini albums in a low profile basket. I like having the small collection of photos of a specific event - very casual and fun. And Star Books are so pretty! And I love that our Designer Series Papers are double sided and sturdy enough to create a book like this!

{Partially Opened}

Here's a view from the top, you can see how the Star Book gets its name! It really a very simple album to put together and it took me less than an hour to cut, assemble and put together the cover for this one. I like that you can tie this mini album closed and it stores easily - it's only 4" tall. Or you can open it completely and tie it again for a beautiful way to showcase it.

Quick, Easy and Beautiful and all ready for my photos!


Recipe:
Stamps: Four the Holidays
Ink: VersaMark, Cherry Cobbler
Cardstock: Jolly Holidays DSP, Very Vanilla, Cherry Cobbler, Old Olive, Baja Breeze
Accessories: Simple Serif Sizzlets, Merry Embosslit, Victoria Lace, Old Olive 5/8" Grosgrain, Heat N Stick Powder, Dazzling Diamonds


My Stampin' Events
Current Stampin' Up! Promotions


Mary Rindal is an Independent Stampin' Up! Demonstrator in Greenwood Village, Colorado.

Thursday, November 25, 2010

Shelli's visit to the 10,000th recruit


Stampin' Up! set a goal to recruit 10,000 demonstrators in the US in 2010. Here is the website if you want to take a look 10,000 in 2010 . Well we reached that goal this week and Shelli Gardner, the Co-founder and CEO of Stampin' Up!, made a surprise visit to the 10,000th recruit and personally delivered her Starter Kit! How exciting would that be to open your door to Shelli Gardner?! Wow! What a fun company Stampin' Up! is to work for and they are always coming up with such great surprises!

Now is the most amazing time to become a Stampin' Up! demonstrator with the Simply Amazing 50% off the Starter Kit! Join Stampin’ Up! between November 15-30 and get 50 percent off the already-low-priced Starter Kit—standard or Digital+! You’ll get over $300 worth of Stampin’ Up! products for just $87.50. And you don't have to pay shipping costs for this either! Visit the Start Your Own Business page on my Stampin' Up! website to learn more. Call or e-mail me if you have any questions - but don't wait - this Amazing deal is only until November 30th! My recruit password is maryrindal and I'd love to have you join my team!


My Stampin' Events
Current Stampin' Up! Promotions


Mary Rindal is an Independent Stampin' Up! Demonstrator in Greenwood Village, Colorado.

Wednesday, November 24, 2010

Color Challenge - Friends Rock

Here's a card I stamped for Holly's Color Round Up #10 - Crumb Cake, Rich Razzleberry, Pumpkin Pie, More Mustard. I used the Friends Rock stamp set from Stampin' Up! - yes, it is on sale in the Online Spectacular! Also, the Vintage Wallpaper Texture Folder is in the background here and then I did some direct-to-paper with the Rich Razzleberry ink to pop the texture some more.

I embossed the You Rock sentiment with Clear Embossing Powder and stamped a few of the images from this stamp set in More Mustard ink second generation behind it. The Mini Vintage Tag is stamped with another image from this set. Finally I sprayed it pretty heavily with some Shimmer Paint Spray - Champagne Shimmer Paint mixed with Rubbing Alcohol - to give it a lot of shimmer and shine!

{Inside}
Recipe:
Stamps: Friends Rock
Ink: Versamark, Rich Razzleberry, More Mustard, Champagne Shimmer Paint
Cardstock: Crumb Cake, More Mustard, Rich Razzleberry
Accessories: Clear Embossing Powder, Vintage Wallpaper Texture Embossing Folder, Pumpkin Pie Narrow Taffeta Ribbon, Mini Vintage Tags,


My Stampin' Events
Current Stampin' Up! Promotions


Mary Rindal is an Independent Stampin' Up! Demonstrator in Greenwood Village, Colorado.

Tuesday, November 23, 2010

Mojo Monday - Baroque Motifs

 A little Mojo Monday stamping this morning for me with some flowers from the Basket Die for the Big Shot and my favorite stamp set Baroque Motifs from Stampin' Up! I spent an hour reading with my son's first grade class before I had a chance to stamp and one of the girls had the prettiest sweater -  Early Espresso with felted wool flowers in Tempting Turquoise, Soft Suede and Old Olive - that inspired my card today.

Where do you get your stampin' inspiration? And did you think that Tempting Turquoise would go so well with the warm earthy colors here? I probably wouldn't have paired it with these colors if I hadn't seen it on a sweater! I love seeing the color combinations from print ads and from fabrics - very inspiring!

SALE ALERT: The Baskets & Blooms die and the Matchbox Die that I used here are on sale this week for 30% off! That's right! If you haven't taken a look at the Online Spectacular from Stampin' Up!, you better go now! There are several items at 30%, 40% and even 50% off! Check my Online Store for details and images. The Scallop Trim Border Punch is on sale, too!


Here's a closer look at some of the elements on this card. I stamped the flourish from Barouque Motifs in Old Olive ink onto a piece of Naturals Ivory cardstock. Then I stamped over this image with the flourish again in Tempting Turquoise ink. This is sponged with a bit of Early Espresso ink and then layered onto a mat of Early Espresso. The flowers are the smaller flowers from the Basket & Blooms XL Die for the Big Shot. This die has some pretty flowers on it to decorate your finished baskets and I thought they were just the right size for this card. I curled the edges of the petals and then sponged them with some Early Espresso ink with a Sponge Dauber. Narrow strips of Early Espresso cardstock are tied through the small flower buttons from the Brights Buttons collection.
 

The label mat here is from the Matchbox Die for the Big Shot. Yes - this die is ALSO 30% off! You can't beat that price and both of these dies are great for table settings and gifties for the holidays! AND - free shipping on orders over $150! But hurry, this Online Spectacular only lasts until just before midnight on November 30th!

{Inside}
Recipe:
Stamps: Baroque Motifs, Thank you Kindly
Ink: Early Espresso, Tempting Turquoise, Old Olive, VersaMark
Cardstock: Early Espresso, Tempting Turquoise, Old Olive, Soft Suede, Naturals Ivory
Accessories: Baskets & Blooms Die, Matchbox Die, Old Olive 5/8" Grosgrain Ribbon, Large Oval Punch, Brights Buttons, Ticket Corner Punch, Scallop Trim Border Punch, Clear Embossing Powder


My Stampin' Events
Current Stampin' Up! Promotions


Mary Rindal is an Independent Stampin' Up! Demonstrator in Greenwood Village, Colorado.

Monday, November 22, 2010

Online Spectacular Starts Today!

For nine days only—November 22-30—get FREE SHIPPING on orders over $150! Plus you can save up to 50 percent off select Stampin’ Up!® products—including My Digital Studio software and Designer Fabric!

Visit my Online Store to see the complete list of discounted items. Or take a look at this PDF file of all the discounted items. Remember this sale ends November 30th!


My Stampin' Events
Current Stampin' Up! Promotions


Mary Rindal is an Independent Stampin' Up! Demonstrator in Greenwood Village, Colorado.

Friday, November 19, 2010

Crystal Effects and Re-inker - Just Believe

Crystal Effects is one of the prettiest products from Stampin' Up! and I found it sad and neglected on my shelves this week, so I decided it was time to play! There are several techniques you can do with Crystal Effects, but all of them require a bit of patience for the CE to dry. But it's always worth the wait!

My favorite way to use CE is to just paint over a stamped image, or a portion of it, then set it aside to dry. It gives such a beautiful, shiny 3D effect.

For this card, though, I did some finger painting with CE and a few Re-inkers.I stamped the wildflower image from Just Believe in StazOn Jet Black ink onto the Whisper White mat. Then I added the (dry) painted Window Sheet over, adhered with a few dabs of CE here and there.


{Inside}
Recipe:
Stamps: Just Believe
Cardstock: Melon Mambo, Tempting Turquoise, Whisper White, Basic Black, Daffodil Delight, Window Sheets
Ink: StazOn Jet Black, Tempting Turquoise Re-inker, Melon Mambo Re-inker
Accessories: Cutter Kit, Crystal Effects, Wide Oval Punch, a tag from Matchbox Die for the Big Shot, Daffodil Delight Ribbon


My Stampin' Events
Current Stampin' Up! Promotions


Mary Rindal is an Independent Stampin' Up! Demonstrator in Greenwood Village, Colorado.

Thursday, November 18, 2010

Sketch Challenge - Baroque Motifs

This bright card is on it's way to Cathy's house - she is a brand new stamper, but amazing artist and crafter. And she joined the Stampin' Up! family this week! I'm excited for her to get in on this Amazing Deal from Stampin' Up right now and so excited to see her stampin' creations because she will be amazing! If you're tempted by the Amazing Deal on the Starter Kit from Stampin' Up! - you should be! It's over $240 of Stampin' supplies for only $87.50 (plus tax, but no shipping!) and you get to choose which stamp sets, ink pads, cardstock, etc - you can't pass this up! If you're ready to say yes - go to my Business Website and you can sign up right now - my recruit password is maryrindal. Call or e-mail me with any questions you have!

Paula over at Stampin' Addicts posts weekly Sketch Challenges and I just love working with them. They give me so much inspiration for my layouts and help get the mojo flowing on those days when I just don't know where to start! :) If you don't already, I encourage you to check them out at Stampin' Addicts Challenges!

{Inside}
Recipe:
Stamps: Baroque Motif, Holidays & Wishes(retired)
Cardstock: Melon Mambo, Daffodil Delight, Tempting Turquoise, Peach Parfait
Ink: Daffodil Delight, Melon Mambo, Tempting Turquoise, Basic Black Craft, VersaMark
Accessories: Iridescent Ice Embossing Powder, Daffodil Delight Taffeta Ribbon, Perfect Polka Dots Texture Folder, Scallops #2 Die for the Big Shot, Tulipe Die for the Big Shot, 1 1/4" and 1 3/8" Circle Punches


My Stampin' Events
Current Stampin' Up! Promotions


Mary Rindal is an Independent Stampin' Up! Demonstrator in Greenwood Village, Colorado.

Wednesday, November 17, 2010

Stampin' Technique Faux Silk - Elements of Style

 This is one of the cards we stamped at my Technique Club this month, using the Faux Silk Technique and the Elements of Style stamp set from Stampin' Up! I made another Faux Silk card, too, that I will share later this week. This is such a pretty technique and I think everyone loved it.

Here's  closer look at the wrinkles of the tissue paper giving it the distinctive Faux Silk look. And who doesn't love the Adhesive Jewels - here are the Pearls.
{Inside}
Recipe:
Stamps: Elements of Style
Cardstock: Pretty in Pink, Rose Red, Chocolate Chip
Ink: Rose Red, Chocolate Chip
Accessories: Decorator Label Punch, Large Oval Punch, Scallop Trim Border Punch, Tissue Paper


My Stampin' Events
Current Stampin' Up! Promotions


Mary Rindal is an Independent Stampin' Up! Demonstrator in Greenwood Village, Colorado.
Related Posts with Thumbnails