Thursday, December 30, 2010

Stampin' Addicts Occasions Blog Hop

Welcome to this stop on the Stampin' Addicts Occasions Mini Catalog Blog Hop! You may have arrived from Carmen's Stamping Addiction blog or maybe not - but however you got here, be sure to click on through at the end and take a look at all the other projects on this Blog Hop! I am excited to share just a few of the project I made with the Botanical Gazette Designer Series Paper and You're a Gem stamp set from the upcoming Occasions Mini Catalog! I've been playing with my new products for a few weeks and am loving the prints in this paper pack and the sentiments in this stamp set are so fun and very versatile.

I haven't been doing much scrapbooking lately and have really missed it - it's one of my New Year's Resolutions to create more scrapbook pages. Here's one I made using a sheet from the Botanical Gazette DSP. I added a few photo tag elements stamped with the You're a Gem stamp set - I'll have a closer look at them next week, so be sure to stop back. This was a pretty simple page and came together very quickly. I let the texture and pattern from the paper shine and added the Jumbo Eyelets and Hemp Twine for interest. The sentiments tags on either side of the photos are from You're a Gem stamp set and are heat embossed with Clear Embossing Powder.


This little Candy Wrapper is my favorite project - well what's inside it is really my favorite, but this packaging turned out really cute, too! And it couldn't be easier! The box is made with the Candy Wrapper Bigz Die for the Big Shot. (This die was originally featured in the Holiday Mini Catalog and is still available to order.) I wrapped it with a strip of pattern paper from Botanical Gazette DSP and a piece of Early Espresso 5/8" Grosgrain Ribbon. This sentiment from You're a Gem is heat embossed with Iridescent Ice Embossing Powder. I tied the tag on with some Hemp Twine with one of the Trinket Keys from the Occasions Mini. How fun is that?! The Trinket Key is a great embellishment and also a sneak peek to what's inside! (There are also Trinket Crowns available and I love them!)

Inside the Candy Wrapper is a Simply Adorned necklace! I made several charm inserts for my Simply Adorned Charms using the Botanical Gazette DSP and You're a Gem stamp set. Look how pretty these are! (I'll show you a few more pictures of the inserts, as well as the reverse sides of each one next week on my blog.) I just love working with these tiny little canvases - the largest charm here is a 1 x 1 1/4" Rectangle and the circle and square charms are only 5/8"! It certainly makes you look at your stamps and papers in a whole new way. I tied on a piece of Victorian Lace and added the Trinket Key to the necklace as well as the 4 charms. And check out the clasp on the charm necklace - see that little oval logo piece, just to the right of the 'love life' charm insert? That is the 'key' to opening your charms - just use it as a lever on the charm clasp and your charms will pop right open.

Finally, here is a card featuring the You're a Gem stamp set front and center! I added a crown from Clearly for You (also available in the Occasions Mini) which is sparkling with Dazzling Diamonds Ultra Fine Glitter, cut out and popped up over the sentiment. The Very Vanilla rectangles are stamped with a small background stamp from Clearly for You and then sponged with Early Espresso ink. I also stamped the Bravo Burgundy card base with my En Francais background stamp. The strip of pattern paper is from Botanical Gazette DSP and I added another piece of it to the inside liner to pull it all together.


That's it for this post - thanks for stopping by! Click on her link to visit the next blog:
 

featuring Nature Walk from the Occasions Mini Catalog!

1. Sarah (willsygirl): XOXO
2. Yapha: Take a Spin
3. Cheryl (lovetostampandscrap): Build a Blossom & Blossom Petals punch
4. Allison (alliohran): Thanks for Caring
5. Rhonda (rhondag): Springtime Vintage DSP & Baby Blossoms
6. Holly P. (HollyLogic): Petal Cone Die
7. Joyce (bronocomom): Springtime Vintage fabric
8. Lisa (genesis): Easter Blossoms
9. Barbara (cre8tivestamper): Bring on the Cake Set & Build-a-Cupcake punch
10. Carmen: Create a Cupcake
11. Mary (MaryR): Botanical Gazette DSP & You're A Gem
12. Holly K. (CatRules): Nature Walk
13. Cindy (CindyE): Clearly For You
14. Jennifer (SunflowerStamper): Bold Blossom
15. Twila (tjdstampsalot): Eat Chocolate
16. Jennifer (jentimko): Say It Simply, Framed Tulips Impressions Folder, Beveled Windowpanes
17. Sara (lilyinkpad): In Stitches wheel & Sweet Stitches DSP
18. Kim (s1itcher46): Sew Suite
19. Kandi (kandicejo): Button, Button
20. Tanya (tanya27): Sew Suite Accessories
21. Betty (kittystamp): Sweet Stitches rub-ons
22. Heidi (hlw966): Plane & Simple
23. Debra (WebDeb): Be My Valentine
24. Krystal (skdeleeuw): Mother of Mine


My Stampin' Events
Current Stampin' Up! Promotions


Mary Rindal is an Independent Stampin' Up! Demonstrator in Greenwood Village, Colorado.

Monday, December 27, 2010

Spring Loaded Card - Hello Again

This simple little card has a surprise inside - it's a Spring Loaded Pop-Up card. This month my Technique Club learned how to make several different moving style cards and this was one that they made. We used the sweet little stamp set Hello Again from Stampin' Up! and colored the images with the Stampin' Markers. By using the Markers to color the image, the butterfly is variegated and the flower is blue with a green stem.

{Inside}To create the Spring Loaded Pop-Up, I punched 3 circles with my 1 3/8" Circle Punch and then spiral cut them with my Paper Snips. These spirals are adhered to the top and bottom of the inside card and then add your pop-up items - we used Butterflies from the Beautiful Wings Embosslit for the Big Shot. And yes, the inside of mine here only shows 2 spirals and is a little worse for the wear after being passed around for class and inspected. :) If you're in the area, be sure to check my Events Calendar for January Classes, including the Technique Club, guests are always welcome!
Recipe
Stamps: Hello Again
Ink: Old Olive, Tempting Turquoise, Early Espresso
Cardstock: Naturals Ivory, Old Olive, Tempting Turquoise, Early Espresso
Accessories: Beautiful Wings Embosslit, Old Olive 5/8" Grosgrain Ribbon, Scallop Border Punch, 1 3/8" Circle Punch


My Stampin' Events
Current Stampin' Up! Promotions


Mary Rindal is an Independent Stampin' Up! Demonstrator in Greenwood Village, Colorado.

Friday, December 17, 2010

Botanical Garden DSP - Clearly for You

Oh I am in Love! I pre-ordered a few new products from the upcoming Occasions Mini Catalog from Stampin' Up! and I just love them! The Occasions Mini Catalog debuts on January 4th with some great new stamp sets, pattern papers and new products, too! Over New Year's weekend I am participating in the Stampin' Addicts Occasions Mini Blog Hop, with 25 blog stops featuring all the different products and stamps and papers from this upcoming catalog. So be on the look out for that, beginning December 31st - you can start right here!

In the meantime, here's a card I stamped using Clearly for You stamp set and a few of the papers from Botanical Gazette DSP. I used the Mojo Monday sketch from a few weeks ago - I'm just behind all this month I think!


{Inside}
Recipe:
Stamps: Clearly for You
Paper: Early Espresso, Marina Mist, Very Vanilla, Botanical Gazette
Ink: Early Espresso, Marina Mist, Sahara Sand
Accessories: Very Vanilla 5/8" Grosgrain, Neutral Brads, Clear Embossing Powder, Sponge Daubers


My Stampin' Events
Current Stampin' Up! Promotions


Mary Rindal is an Independent Stampin' Up! Demonstrator in Greenwood Village, Colorado.

Filled with Love Bundle Promotion


Here's a great promotion from Stampin' Up! to help you get ready for Valentine's Day! Starting today, from December 17, 2010, through January 24, 2011, receive a FREE package of Bitty Buttons (a $4.95 value) when you purchase the Stampin' Up! Filled with Love Bundle

The Filled with Love Bundle contains the Filled with Love Stamp Set (in wood-mount or clear-mount) and the exclusive Love Patterns Designer Series Paper Pack. The Bitty Buttons are a great addition to the bundle. So many cute things you can make with them!


To order the Filled With Love Valentine's Bundle or any other products, please visit my online store HERE.


My Stampin' Events
Current Stampin' Up! Promotions


Mary Rindal is an Independent Stampin' Up! Demonstrator in Greenwood Village, Colorado.

Monday, December 13, 2010

Color Roundup - Winter Post Gift Tag

Holly over at Rubber Redneck posts a weekly Color Roundup - a Color Challenge that I like to play, however this week I was a tad bit late! Her colors were Real Red, Kraft and Old Olive - yummy Christmas colors! Here is a really quick Gift Tag I made using the Top Note Die and Winter Post stamp set from Stampin' Up! I tied it to a cellophane bag of Strawberry Popcorn that I made this weekend for my son.

The pattern paper here is a strip from Holly Jolly DSP and I added a Real Red Satin Ribbon tie.


My Stampin' Events
Current Stampin' Up! Promotions


Mary Rindal is an Independent Stampin' Up! Demonstrator in Greenwood Village, Colorado.

Thursday, December 9, 2010

Thoughts & Prayers - Crystal Effects

Here is another Crystal Effects with Re-inker technique card. I love the bright color combination of Melon Mambo and Tempting Turquoise and the swirls of Dyed Crystal Effects are so pretty that I have a hard time covering them up with anything! So I put just a narrow strip of sentiment on here. These trees are from the Stampin' Up! Thoughts & Prayers stamp set. I stamped them in StazOn Jet Black ink directly onto the Window Sheet. The edges of the Tempting Turquoise mat are roughed up with the distressing tool from the Cutter Kit.

I posted another card with this same technique using the Just Believe stamp set last month. Click on this link to view that card and read how I created the Crystal Effects background.
{Inside}
Recipe:
Stamps: All Holidays, Thoughts & Prayers
Ink: Melon Mambo Re-inker, Tempting Turquoise Re-inker, Stazon Jet Black
Cardstock: Melon Mambo, Tempting Turquoise, Basic Black, Whisper White, Window Sheet
Accessories: Crystal Effects, Cutter Kit


My Stampin' Events
Current Stampin' Up! Promotions


Mary Rindal is an Independent Stampin' Up! Demonstrator in Greenwood Village, Colorado.

Monday, December 6, 2010

Kids cards - Extreme Skateboard

Stampin' Up! carries some great individual stamps for under $10 each, and some of my favorites are the silhouettes - Extreme Skateboard, Extreme Snowboard, Extreme Dirt Bike,Extreme Surfboard and Extreme Guitar. All of these make quick and easy and fun cards appealing to kids, teens and adults. I think cards for older kids and teens are hard to make and appropriate images hard to find.

This card uses the Polka Dot Texture Folder for the Big Shot, a tab of Real Red 5/8" Grosgrain Ribbon and the Extreme Skateboard image. Here's a closer look at the Iridescent Ice Embossing Powder I used on the sentiment to give it a little extra shine. This sentiment is from the retired Stampin' Up! set Starring You.


{Inside}
Recipe:
Stamps: Extreme Skateboard, Starring You (retired)
Cardstock: Pacific Point, Certainly Celery, Pumpkin Pie, So Saffron, Real Red, Whisper White
Ink: Pacific Point, Basic Black Craft
Accessories: Polka Dot Texture Embossing Folder, Iridescent Ice Embossing Powder, Real Red 5/8" Grosgrain Ribbon


My Stampin' Events
Current Stampin' Up! Promotions


Mary Rindal is an Independent Stampin' Up! Demonstrator in Greenwood Village, Colorado.

Wednesday, December 1, 2010

Crystal Effects - Butterfly Die

Here is another Crystal Effects and Re-Inker card I made using the same technique as this Just Believe card from last week. I used the decorated Window Sheets, after they had dried over night, with the Beautiful Butterfly Bigz Die for the Big Shot and created these two gorgeous butterflies. This is a pretty simple card, mostly because I wanted the focus on the butterfly elements and so that the card wouldn't get too 'busy.'

I also trimmed the front of the card base and added the Rich Razzleberry Scallop Border, so that inside of the card is visible from the front. A bow with White Taffeta Ribbon finished it off for me. This 'cherish' sentiment is from my well loved Baroque Motifs stamp set. If I make another of these cards, the only thing I would add is a light dusting of Dazzling Diamonds glitter to the wet Crystal Effects.


Here's a closer look at one of the butterflies. I pushed Crystal Effects and a few drops of Re-Inker (Wild Wasabi and Rich Razzleberry) around on the Window Sheet. I put another Window Sheet over these and pressed them together lightly to spread the mixture to both sheets. Then I pulled them apart and set them aside to dry. When they were nearly dry, but still a little tacky I laid them each onto a piece of Whisper White cardstock and then put this through the Big Shot with the Beautiful Butterfly Bigz Die. I adhered two of the butterflies to my card with glue dots in the middle only, so that they float a tiny bit. The bodies are a few of the Basic Jewel Pearls adhered down the middle.


My Stampin' Events
Current Stampin' Up! Promotions


Mary Rindal is an Independent Stampin' Up! Demonstrator in Greenwood Village, Colorado.

Tuesday, November 30, 2010

Vintage Christmas - Dasher

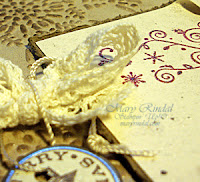
Lovely and sparkly and faded and shabby - that's the vintage look I was going for with this card.  Vintage is a style that I love, but I think it's one of the more difficult styles for me to create. But for the card I used some Stampin' Up! products and colors that really lent themselves to Vintage and that helped me! The Dasher stamp Heat Embossed in Rich Razzleberry with the Cutter Kit to distress the edges of the Soft Suede mat, the beautiful and soft Victoria Lace and these Mini Vintage Tags.


Here's a closer look at the splatter and sparkled from a heavy spray of Shimmer Paint Spray. I ran the Crumb Cake piece through the Big Shot with the Northern Flurries Texture Folder and then used a Sponge Dauber to add some Soft Suede ink onto the raised snowflakes. I sprayed both this piece and the matted Dasher piece with the Shimmer Paint Spray and then added the other elements.


The Mini Vintage Tags are a bit shimmery themselves, and I stamped this one with the sentiment from Delightful Decorations in Soft Suede ink. Then I tied it onto the bow from the Victoria Lace, which I am just in love with! I popped both the Dasher piece and the tag up on Stampin' Dimensionals for the height and so that lovely tag stayed just where I wanted it to be.


{Inside}
Recipe:
Stamps: Dasher, Delightful Decorations, Four the Holidays
Ink: VersaMark, Rich Razzleberry, Soft Suede, Champagne Shimmer Paint
Cardstock: Soft Suede, Crumb Cake, Naturals Ivory
Accessories: Northern Flurries Texture Embossing Folder, Clear Embossing Powder, Cutter Kit, Victoria Lace, Mini Vintage Tags


My Stampin' Events
Current Stampin' Up! Promotions


Mary Rindal is an Independent Stampin' Up! Demonstrator in Greenwood Village, Colorado.

Monday, November 29, 2010

Adhesives - such a Personal Decision

A few weeks ago I shared some of my favorite tools - those Stampin' Up! products that are always on my table helping create my projects. Today I want to talk about another behind-the-scenes tool - Adhesive. What do you prefer to use when assembling cards, 3D projects or scrapbook pages? When I started stamping years ago I tried several different kinds and brands of adhesive that my friends were using or that different stamp instructors were using. I ended up primarily using Scotch Double Sided Tape as my Adhesive of Choice.

When Stampin' Up! started carrying the Tombo Mono Multi-Purpose Liquid Glue (the little green bottle) I gave it a try and fell in love! Tombow Mono Multi is my go-to adhesive for most of my cards and projects. It has a bit of a learning curve as far as how much or how little to use - often much less than you think! It's a strong little glue and will hold your layers together well and for a long time. I like that it has a 'slide factor' when I first put my pieces together. That gives me just a few seconds to be sure my layers are aligned evenly the way I want them. Then a quick rub and they are stuck together permanently! Mono Multi is a temporary OR permament adhesive - to use it as a temporary adhesive allow it to dry before adhering. To use it as a permanent adhesive, adhere while still wet. And to remove any messy glue residue, if you have some liquid that squeezes out between your layers, lift the excess with a Paper Piercer or scrap of cardstock, allow the remainder to dry and then remove it with the Adhesive Remover. I used to use a lot of Sticky Strip when I was working with 3D projects and boxes, however I've found that Tombow Mono Multi holds these together very well and I'll use Tombow first on those items.

As much I love the Tombow Mono Multi, it just doesn't work well with fabric or ribbon. Mini Glue Dots are another adhesive that is perfect to stick down that ribbon knot, keep that bow in place or tuck a piece under the cardstock mat. I use my Paper Piercer to pick up a Mini Glue Dot and stick it just where I need it to do its work.

And I can RARELY create a stamped card or scrapbook page without some Stampin' Dimensionals! These beauties  are double-sided adhesive foam mounts that add height and create beautiful layers and dimension on your projects. I like their thickness, but occasionally I will stack two on top of each other to give something a little EXTRA lift. The hexagon shapes are just the right size for most projects and I even like to use the straight edges of the border strips, too.

As much as I love these Adhesives, especially my Tombow Mono Multi, I know that adhesives are a personal choice and you've got to try several to find just the right one for you and your projects!


My Stampin' Events
Current Stampin' Up! Promotions


Mary Rindal is an Independent Stampin' Up! Demonstrator in Greenwood Village, Colorado.
Related Posts with Thumbnails