


My Stampin' Events
Current Stampin' Up! Promotions
Mary Rindal is an Independent Stampin' Up! Demonstrator in Greenwood Village, Colorado.
 Here's another graduation card using the Pomp and Circumstance stamp set from the Occasions Catalog from Stampin' Up! This card also uses the Peekaboo Big Shot Die for an interactive element on the card front. This sentiment pair really works well with the Peekaboo Die. I've been on an embossing kick lately and this card has lots of Heat Embossing, too.
 The Curly Label Peek-A-Boo Frame is die cut from Basic Black cardstock, using the Standard Crease Pad in lieu of the top cutting plate. I also used a Shim underneath this sandwich to help create enough pressure to cut and score, but not so much pressure than it cuts everything. This can vary a little from machine to machine, so you'll have to see if you need a shim or not with your Crease Pad. The Crease Pad does help ensure a nice score line, which is part of the peekaboo window. Here's what my sandwich looks like, although with Black cardstock on the black Die, with a black Crease Pad, it's probably hard to see detail. The bottom piece is a cardboard shim, one of the pieces of light weight cardboard that comes with each of the Big Shot Dies.
 Here is another card using the Sale-A-Bration (FREE!) stamp set Petal Parade from Stampin' Up! For this card I used some bright colors of ink and cardstock, including Gumball Green, one of my favorite In Colors. I also used one of the new Tag Topper Punches from the Occasions Mini Catalog - so fast and easy to get perfect corners and a ribbon hole on these tags! This bright and cheery card came together very quickly.
 I randomly stamped the images from Petal Parade in Raspberry Ripple, Tangerine Tango and Gumball Green inks. The hello there sentiment from Happy Day is stamped in Raspberry Ripple as well with a narrow band of Raspberry Ripple cardstock to set it off from the flowers on the tag. I wrapped the Gumball Green Stitched Satin Ribbon with some White Baker's Twine to top off this tag. The background piece is a piece of Gumball Green Core'dinations cardstock texture embossed in the Big Shot with the Fancy Fan TIEF. Then I sanded it heavily with a Sanding Block to bring out the core color, which is perfect for highlighting the texture of our Textured Impressions Embossing Folders.
  {Inside}

 I did a little Scrapbooking this weekend and one of the pictures I have is this candid shot of my daughter on her way to school. She was dressed in camouflage for a Homecoming Week 'Camo' day last fall. She is 16 and so happy, life truly is good for her, and this makes me so happy knowing her inner confidence and joy.


Gorgeous Grunge Blog roll
- Heidi Baks runningwscissorsstamper.
blogspot.com - Cindy Beach stampspaperandink.typepad.com/
- Beth Beard mylittlecraftblog.com/
- Adriana Benitez escape2stamp.com
- Tanya Boser tinkerin-in-ink.
blogspot.com - Debra Burgin heartfeltinkspiration.
com/ - Jill Coleman jillstamps.com/
- Deb Currier artfeltimpressions.blogspot.
com/ - Mike Funke stampin-style.
typepad.com/ - Shana Gaff stressfreestamping.
blogspot.com - Holly Krautkremer rubberredneck.
typepad.com - Mary Rindal maryrindal.com
- Martha Stewart seasonsofstamping.
com/ - Dawn Tidd tiddbitsfromdawn.
typepad.com - Lisa Young addinkandstamp.blogspot.com/
- Kerry Willard Bray kerrywillardbray.com
- Paula Wright paulastamps.blogspot.
com/ - Rita Wright ritascreations.
blogspot.com/ - Betty Traciak kittystamps.blogspot.com
- Nancy Smith iguanastamp.wordpress.com
 Valentine's Day is exactly one day away - are you ready? Do you celebrate Valentine's Day? Have you made plans? How about a blue Valentine's card with lots of glitz and gold? I stamped this card over the weekend and couldn't stop adding Gold elements! This card uses some images from new sets in the Occasions Catalog from Stampin' Up! The heart image is from Peachy Keen and the sentiment is one of many in the Perfect Pennants stamp set. And of course the background is the ever versatile En Francais background stamp.


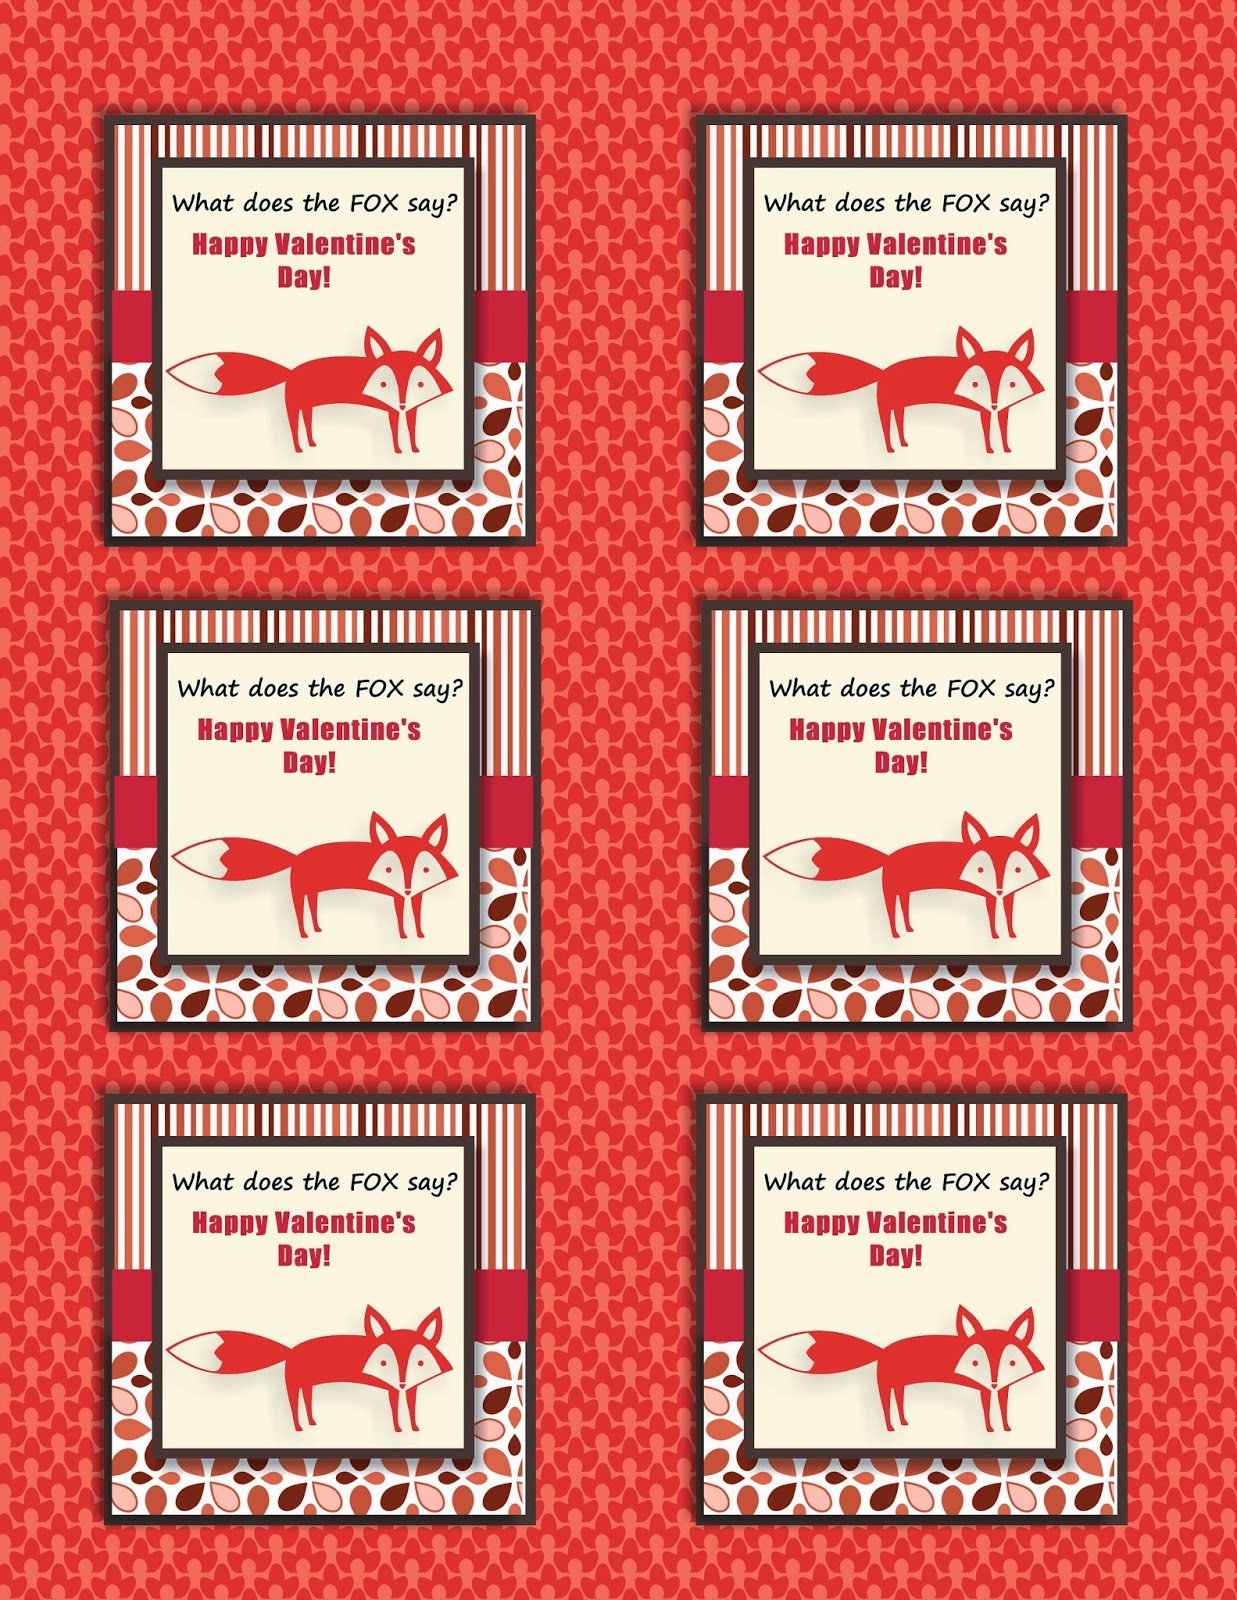 I uploaded a sheet of Fox Valentine's, without his name, for a free jpeg download What does the Fox Say? Valentines. If you download this file, please let me know how the file works for you - thanks!

 To doll it up a bit, I added strips of Cherry Cobbler along the top and bottom edge of the bag and created Cherry Cobbler handles by folding a piece of 1 x 9 cardstock in half and punching the ends in a Circle Punch to round them off. Antique Brads were just the right element to put these handles onto the bag. Finally, I tucked a lip gloss and note into a mini envelope made with the Envelope Punch Board and tied it off with a length of Soft Suede Taffeta Ribbon.

 Then I stamped the string of lanterns in Rich Razzleberry ink across the top and lower corners, filling them with a variety of bright paper lanterns. The sentiment Congratulations is stamped in Rich Razzleberry ink and Heat Embossed with Clear Embossing Powder. Be sure to use your Embossing Buddy before stamping anything you want to emboss or you will have Embossing Powder all over. I covered the paper lanterns with Crystal Effects and set that aside to dry. Finally, I added the happiness sentiment banner with an anchor of Daffodil Delight Rolled Flower. These Rolled Flowers use the Sticky Rounds, with twisted and wrapped Daffodil Delight Seam Binding.


